Friday 8 May 2020

Celebration Moon and Star Treats - 30 Day Craft Challenge


Celebration Moon and Star Treats - 30 Day Craft Challenge


Salam all! Today was Day 14 of our challenge and it was a nice and relaxing one. We discussed that in the evening we will celebrate the birth of the first grandson of Prophet Muhammad (peace be upon him), Imam Hassan (peace be upon him). We discussed his importance in our faith and how, as his followers, we should rejoice on the occasion of his birth. 

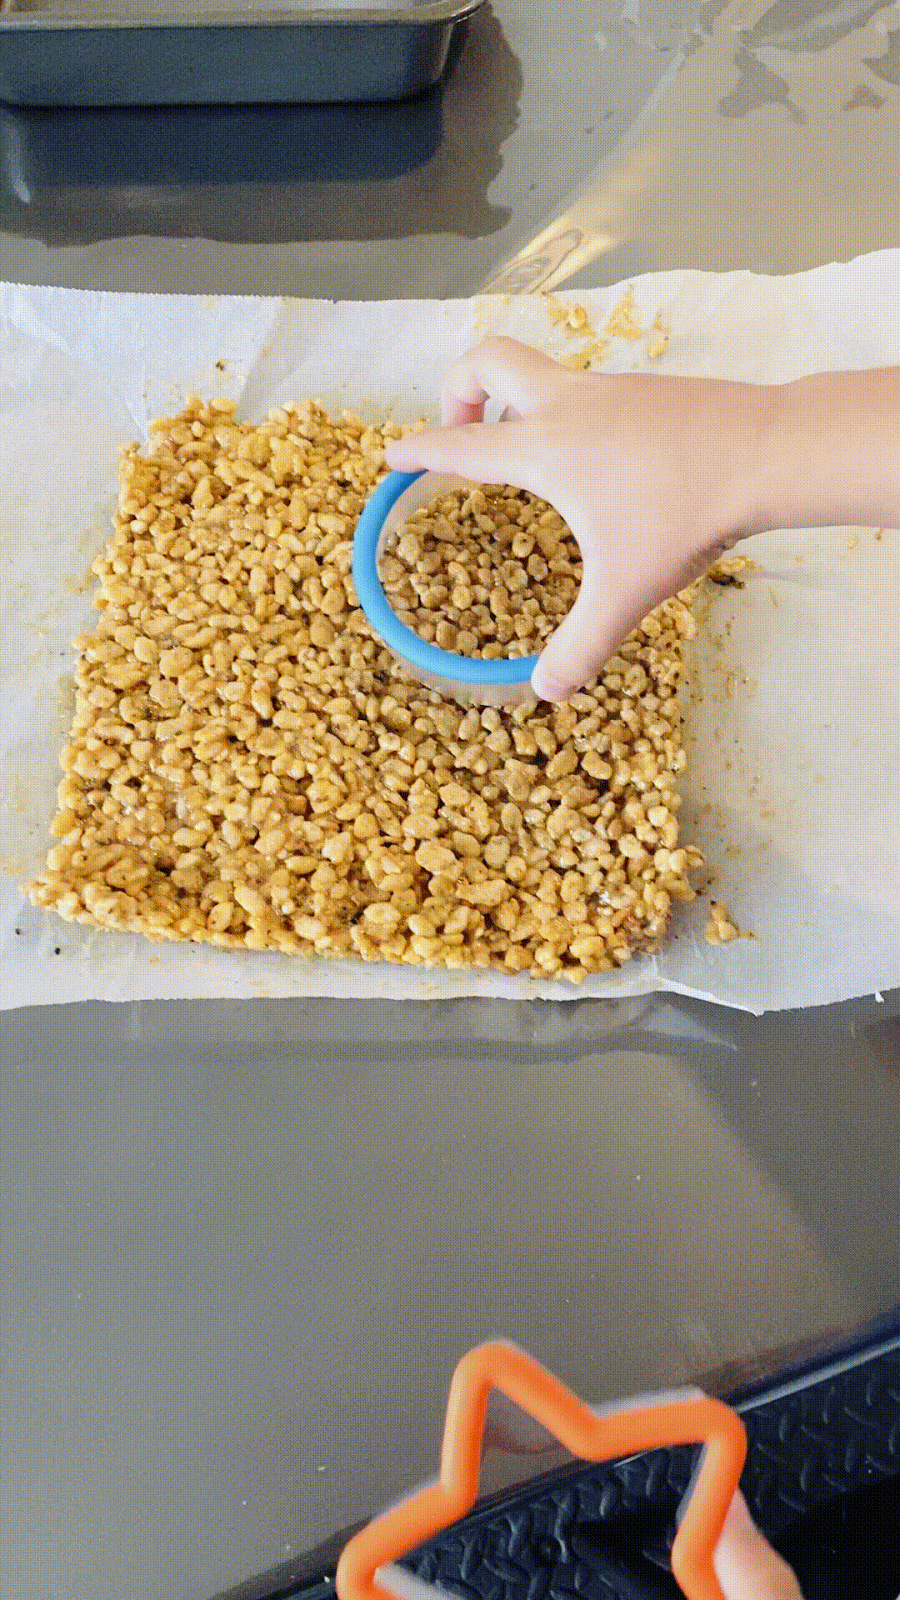
In order to celebrate, we decided to make some special treats together. This was a bit of a change from the type of crafts we have been doing for the past two weeks but the kids welcomed this change. We followed an easy recipe of rice crispy treats, then we cut them in the shape of moons and stars. Scroll down to see how we made this evening extra special!

Materials:
  • Rice crispy recipe of your choice
  • Cookie cutters - we used stars and moons (we used a circle cutter for the moon)
  • Optional: Chocolate chips 
  • A serving plate
  • Tiny mouths to enjoy the treats!
Steps:
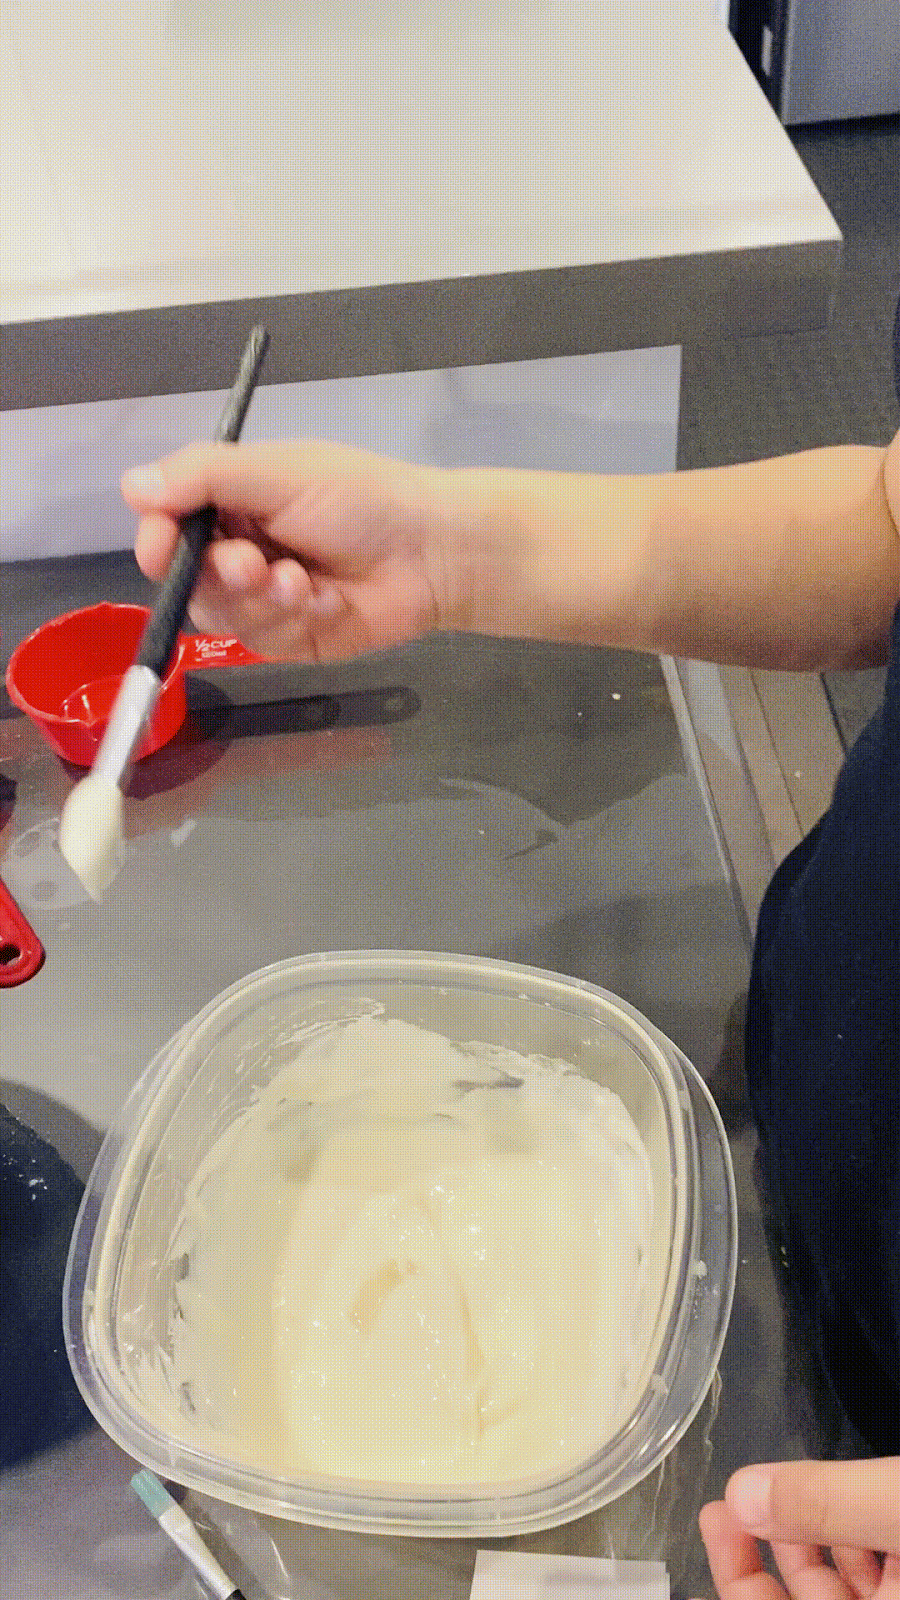
  1. Follow your favourite recipe for rice crispy treats. We didn't have marshmallows so we tried something a bit different. We used the following recipe for Vegan Rice Crispy Treats. It was a huge hit with the kids!
  2. Once the treats were nice and firm we used our cookie cutters to make the star and moon shapes
    They enjoyed hearing the crunching sound as they pushed down
  3. After we had our shapes, we set them on a separate plate and topped them with delicious chocolate chips
    This made them super excited about the treat!
  4. Now the hard part, wait for iftaar time before you can devour the treats!
Here was our simple yet satisfying activity for the day. I send all of your many prayers and well wishes on the auspicious occasion of the birth of Imam Hassan (peace be upon him). Hope you all have a lovely time celebrating with your families! See you tomorrow for our next activity!

Thursday 7 May 2020

The Cave of Hira - Paper Mache Craft - 30 Day Craft Challenge


The Cave of Hira - Paper Mache Craft - 30 Day Craft Challenge


Salam and welcome to Day 13 of of this Craft Challenge. Today's craft left the boys in complete wonder and admiration. We discussed how the Quran was revealed to our beloved Prophet Muhammad (peace be upon him). We talked about how he would climb the mountains in Makkah to reach the Cave of Hira. Here, he would pray to Allah and connect with him on a superior level. I shared my personal story of climbing this mountain to reach the Cave of Hira while I was on the pilgrimage of Hajj. I described how physically challenging it was and how much effort it took for just one climb and descent. Then we imagined the troubles our Holy Prophet (peace be upon him) would go through to reach that level on a daily basis. Allah surely appreciated his efforts, and in turn, he revealed the miracle of the Quran upon his heart. 

This craft brought me back to my elementary school days where we would make several different pieces of art using paper mache. It felt nostalgic to me to do this once again after so many years - but I also felt a sense of gratitude that I am now doing this with my own children. Most of you are well aware of the process of paper mache so my steps wont be too detailed. Scroll down and enjoy!

Materials:

  • Paper mache paste - here's a link with details about how to make it yourself: Paper Mache Paste
  • Paintbrush
  • Newspaper cut into strips
  • Scissors
  • Balloon, blown into the size you want your cave to be
  • Bowl sized to hold your balloon in place
  • Paint
  • Sharpie
Watch a fun YouTube video of how we did this activity: Here
Steps:
  1. Place your balloon on top of your bowl so that it is stable 
    The balloon should be snug
  2. Start pasting your newspaper strips onto the balloon
    Be generous with the paste
  3. Keep adding layers of paper mache, feel free to overlap and paste the newspaper strips in different directions to have a sturdy structure
    The newspaper strips will start to stick on nicely once they are wet with the paste
  4. Keep adding strips until you begin to cover the surface of the balloon, keep in mind the lower part of the balloon, which is in the bowl, does not need to be covered.
    Hadi making good progress!
  5. Add 2-3 layers of paper mache until you are satisfied with the coverage. Note that too many layers will take too long to dry. 
    At this point we were satisfied with our work
  6. Set aside to dry - I left ours on a table with a fan running directly at it and it dried within 2-3 hours. If you find that after 3 hours it is still wet you may consider preheating your oven to 200 degrees Fahrenheit then turning it off and placing your semi-dry craft inside the oven. Be sure to pop the balloon before this and place the craft on a cookie sheet or oven safe surface.
  7. Once your craft is completely dry you can remove it from the bowl and pop the balloon (I just used our scissors to do this) - it will slide right out. 
  8. You can now place the craft on a surface and draw the entrance to the cave
    Hadi drew his version of a cave entrance
  9. Use regular craft scissors to cut this shape out
    It's starting to look a lot like a cave now
  10. Use your choice of paint to give the craft a cave look. We didn't have brown or beige so we mixed a whole bunch of colours to come up with this
    All three of my kids were in on this action!
  11. Keep going until you've covered the entire cave
    Finishing up with the painting
  12. This should take about 1-2 hours to dry. Side note: I had so much of this paint left over that I painted some cardboard with the same colour and created a matching surface (completely optional)
    Here it is drying away
  13. Once the cave is dry, we grabbed some pebbles from outside and made a little sign - this gave a neat effect. 

    It ended up looking pretty cool!
  14. Right before bedtime I found some string lights we had in storage and placed them into the cave. The kids were in complete awe! It was really amazing to look at! We might even use this as a night light. 

    Magical!
Many, many thanks for reading our paper mache journey to the very end! I hope you enjoyed reading about this activity. We thoroughly enjoyed every bit of it. Although this was a lengthy craft - it was totally worth it in the end! Please leave a comment below about how you would improve this or if you are willing to try! I love hearing feedback. See you all tomorrow inshaAllah!

How to Make Paper Mache Paste at Home


How to Make Paper Mache Paste at Home

Hello friends! I imagine that I will be doing Paper Mache regularly with my children since they enjoyed it so much this time. I was searching online and discovered that authentic paper mache paste requires some cooking - we definitely didn't have time for that. So, I decided to make a separate page describing how to make the paper mache paste that worked so well for us today - no cooking involved!

Materials:
  • 1/2 Cup Flour
  • 1/3 Cup Icy Cold Water
  • 1/4 Cup Half School Glue Half Water Mix
  • 1 Tablespoon of Salt
  • Mixing tool
  • Container to make the paste in
Here's what you'll need - I took the pic after we had already poured in the flour!

Steps:
  1. Mix all of the above ingredients into your container 
    The boys love pouring and mixing!


  2. Mix thoroughly until you get a nice paste consistency. If it feels too thick you may need to add a bit of water - try a tablespoon at at time.

  3. Test out the consistency of the paste on your paper mache project it should be a nice, soft, spreadable paste. 
There's the magic recipe for the perfect paper mache paste! Let me know in the comments how it worked out for you.


Wednesday 6 May 2020

Pipe Cleaner "Prayer Buddies" - 30 Day Craft Challenge


Pipe Cleaner "Prayer Buddies" - 30 Day Craft Challenge


Salam and welcome to today's exciting Craft Challenge. We are now at Day 12 of this challenge and, Alhamdulillah, the energy is still up - hopefully we can keep going! Today we talked about the different positions in our daily prayer (salaat/namaaz). There are a number of different positions but we focused on three: Qiyam, Ruku, and Sajda. Hadi, my older son, showed Hani these positions and we talked about how to do them correctly. 

This craft was inspired by a Youtube video clip I saw that shows how to make "Beaded Pipe Cleaner People". The video is linked here. Please watch this short video (1 minute and 33 seconds) before you make this craft. After viewing this clip, I decided to alter the craft a little bit to teach the kids about the positions of salaat. I used the lettered beads that we already had, in place of some of the beads that are used in the video clip. Other than that, its pretty much the same! 

Please scroll below to see how Hadi and Hani made their Pipe Clean Prayer Buddies!

Materials:


  • Two pipe cleaner stems (per person)
  • Plastic straw
  • Scissors
  • Beads (in our case, lettered and regular beads)
  • Sharpie
    This is pretty much everything you'll need (I'm missing the Sharpie in the picture)
Steps
  1. Pass through four beads or the letters you need through two pipe cleaners 
    Then you can separate the stems on the top and bottom
  2. Cut the straws into four larger pieces and four small pieces 
    These are the sized of plastic straw you'll need as shown in the Youtube video
  3. Pass through two of the larger sized straw pieces on each of the bottom stems - these will be the legs 

    Here's Hadi sliding the leg straws up


  4. Pass through one regular bead on each leg - those will be the knees
    Then one regular bead for each leg
  5. After the beads, bend the bottom parts of the stem in half on each side
  6. Then, add one smaller straw piece on each leg. 
    Then bend the stems and form the feet
  7. You can now work on the upper part of the prayer buddy
    Arrange the top of your buddy to look like this
  8. Pass through one of the small pieces of the straw for each arm and bend over their hands as well (this is a little different from the Youtube video because our stems weren't as long)
  9. Pass through one of your regular beads at the top representing the neck
  10. Now pass through one of your larger beads representing the head - it will go through both stems at the top
  11. Draw on your buddy's face with your sharpie marker
  12. Fold over the excess pipe cleaner over the head - to represent hair 
    We only had two of the large beads for the heads, so we had to improvise for the third!


  13. Now your child can practice the different positions of salaat with their prayer buddies!

    Here's Qiyam
We've got Ruku

And of course, Sajda

We managed to get a group photo of all buddies! Taken by Hadi
A heartfelt thank-you for joining us on this journey! I'm amazed by the support and love that our community has given me as I share these crafts with you all. You all are the real MVPs!
We'll see you tomorrow with a new craft, inshaAllah!


Tuesday 5 May 2020

The Ash-Shams Sun Catcher - 30 Day Craft Challenge


The ash-Shams Sun Catcher - 30 Day Craft Challenge


Salam everyone! Today I'll be posting our Day 11 craft. Our focus was on Surat ash-Shams (Arabic: الشمس‎, "The Sun") - Surah number 91 in the Holy Quran. We listened to its recitation and and discussed a little bit of its meaning. We focused on how to pronounce the word ash-Shams in Arabic as it appears in the Quran. We talked about how important the Sun is for the survival of life on Earth. We thanked Allah (swt) for giving us the Sun and the boys expressed how much they love sunny days. After this discussion we started our daily craft. 

Today we made Sun-catchers, that are meant to stick onto windows to give off beautiful multi-coloured light all day long. This craft required a lot of patience because we were pasting small pieces of streamers onto a surface so it took a little more time than the kids are used to spending on daily crafts. There is a shorter more express version of this craft - if you scroll all the way to the bottom you can see it!

For this blog post I am going to post my pictures and steps together so that I can clarify what exactly we did for this craft. Enjoy!

Materials:
  • Streamers or wrapping tissue in different colours cut into small squares/rectangles
  • Scissors
  • School glue
  • Clear Tape
  • One Large sized Ziplock bag
  • Yellow coloured construction paper
  • Clear Tape
  • Paintbrush 
  • Sharpie/Permanent marker
Steps:
  1. Use your scissors to cut your Ziplock bag into two separate clear sheets 
  2. Use your sharpie to draw a large circle on the surface of one sheet of the Ziplock bag
  3. Dilute your school glue with water - half water and half school glue - we will call this paste 
  4. Take your paintbrush and start spreading the paste onto the sheet (within the circle you just drew) 
  5. Now take your tissue or streamers and start pasting them onto the surface in a mosaic style 
    Here you can see us using wax paper but we re-did the activity with the Ziplock and it worked much better!
  6. Be sure to cover the entire surface and feel free to overlap the tissue as you work along
  7. Once you've covered the entire circle, set it aside and allow 2-3 hours for your mosaic to dry. 
  8. In the mean time cut out a sun shape with your yellow coloured construction paper

    Fold your sun in half and cut another circle through the middle
  9. Once your mosaic is dry, you can peel it off easily from the Ziplock. It still peels off from the wax paper but its not as easy to do so. 
  10. It will look like a nice bright mosaic
  11. Trim the edges of the mosaic to make it into a neat circle
  12. Use your clear tape to stick the mosaic onto the sun
    Be sure to flip your mosaic over so the front will be framed by the sun

  13. This is optional but you can cut a second sun and glue it to the back of your craft - this gives it some added neatness
  14. We pasted the second cut out to the back of our craft so it can be appreciated from the outside of our window and the inside! 
  15. I wrote the word الشمس‎ for Hadi in pencil as well as "The Sun" on the front of our craft and he traced over it in black marker 

    Tracing Fun!
  16. We used our clear tape to stick the craft to our windows

  17. We had some left over mosaic so we cut out some free hand suns and taped them as well - this is a great option if you didn't want to do the yellow construction paper part - and just want an easier/faster activity!
    These have a beautiful look to them as well!
    These are our "ash-Shams" Sun Catchers!

This is what I have for today! Keep following and InshaAllah I will see you tomorrow!

The Best Day Ever - Greeting Card